Do you want to build an advanced AIS station with Raspberry Pi?
rPiAIS project is an implementation of AIS Dispatcher for Raspberry Pi devices. It supports broad range of AIS receivers connected via serial, USB or Ethernet cable and provides:
- receiving and processing of all standard AIS messages
- streaming raw AIS feeds to multiple destinations
- advanced monitoring of device status, coverage and message statistics
- embedded electronic map with all received vessels
Installing rPiAIS on your SD card
- Download rPiAIS image and save the file on your computer. Clicking on the link will automatically download the file into the download folder.
- Go to https://etcher.io/ download the SD card writer (approx 80MB) and follow the directions to install the program.
- Open Etcher. Etcher may need to be run as administrator (for Windows: right-click, "Run as Administrator", for Mac OS X: control + open application).
- Select the rPiAIS image file.
- Select the correct Micro SD card USB drive carefully! The process will overwrite any data on the drive! Consider removing external hard drives and other devices to avoid accidentally overwriting the data.
- Once you are sure the correct drive is chosen press 'Flash!'
- After rPiAIS is installed Etcher should automatically eject the SD card, if not manually eject the SD card and remove from the computer.
WiFi and SSH configuration (optional)
WiFi network
If you want to use WiFi connection, you should:
- open your SD card
- open wifi folder ( for Linux/Mac users – SD card boot partition /wifi )
- rename the file wlan0.txt.example to wlan0.txt
- open wlan0.txt with text editor (e.g. notepad) and configure your SSID and WiFi password:
SSID myssid
PASS mypassphrase
COUNTRY EU
If you want to disable automatic wifi configuration just delete the wifi folder.
Enabling SSH
To enable ssh service, open your SD card and follow steps below:
| for a single session | rename/copy the file START_SSH.txt.example to START_SSH.txt |
| permanently | rename/copy the file ENABLE_SSH.txt.example to ENABLE_SSH.txt |
Connecting your rPiAIS
- Insert SD card into your Raspberry Pi and power it on
- Connect your Raspberry Pi to your local network
By default rPiAIS connects automatically via DHCP. You can check your IP address by connecting external display and keyboard and logging into your rPi with the default credentials:
- Username: pi
- Password: raspberry
After successful login your IP addresses will be displayed in the welcome message.
If your network does not support DHCP or if you have any problems with automatic connection, you can always use the fallback IP address
172.16.32.254 (on Ethernet interface only!)
You should set your PC with:
- IP: 172.16.32.253
- Net mask: 255.255.255.252
Opening AIS Dispatcher configuration
Start your browser and open URL:
http://IPADDRESS:8080 (change IPADDRESS with your IP address)or if you have used the fallback IP configuration:
http://172.16.32.254:8080 (fallback IP configuration)
If your router (DHCP server) supports DDNS updates you can simply use:
http://rpiais:8080
Default web login credentials are:
- Username: admin
- Password: admin
Configuring AIS Dispatcher
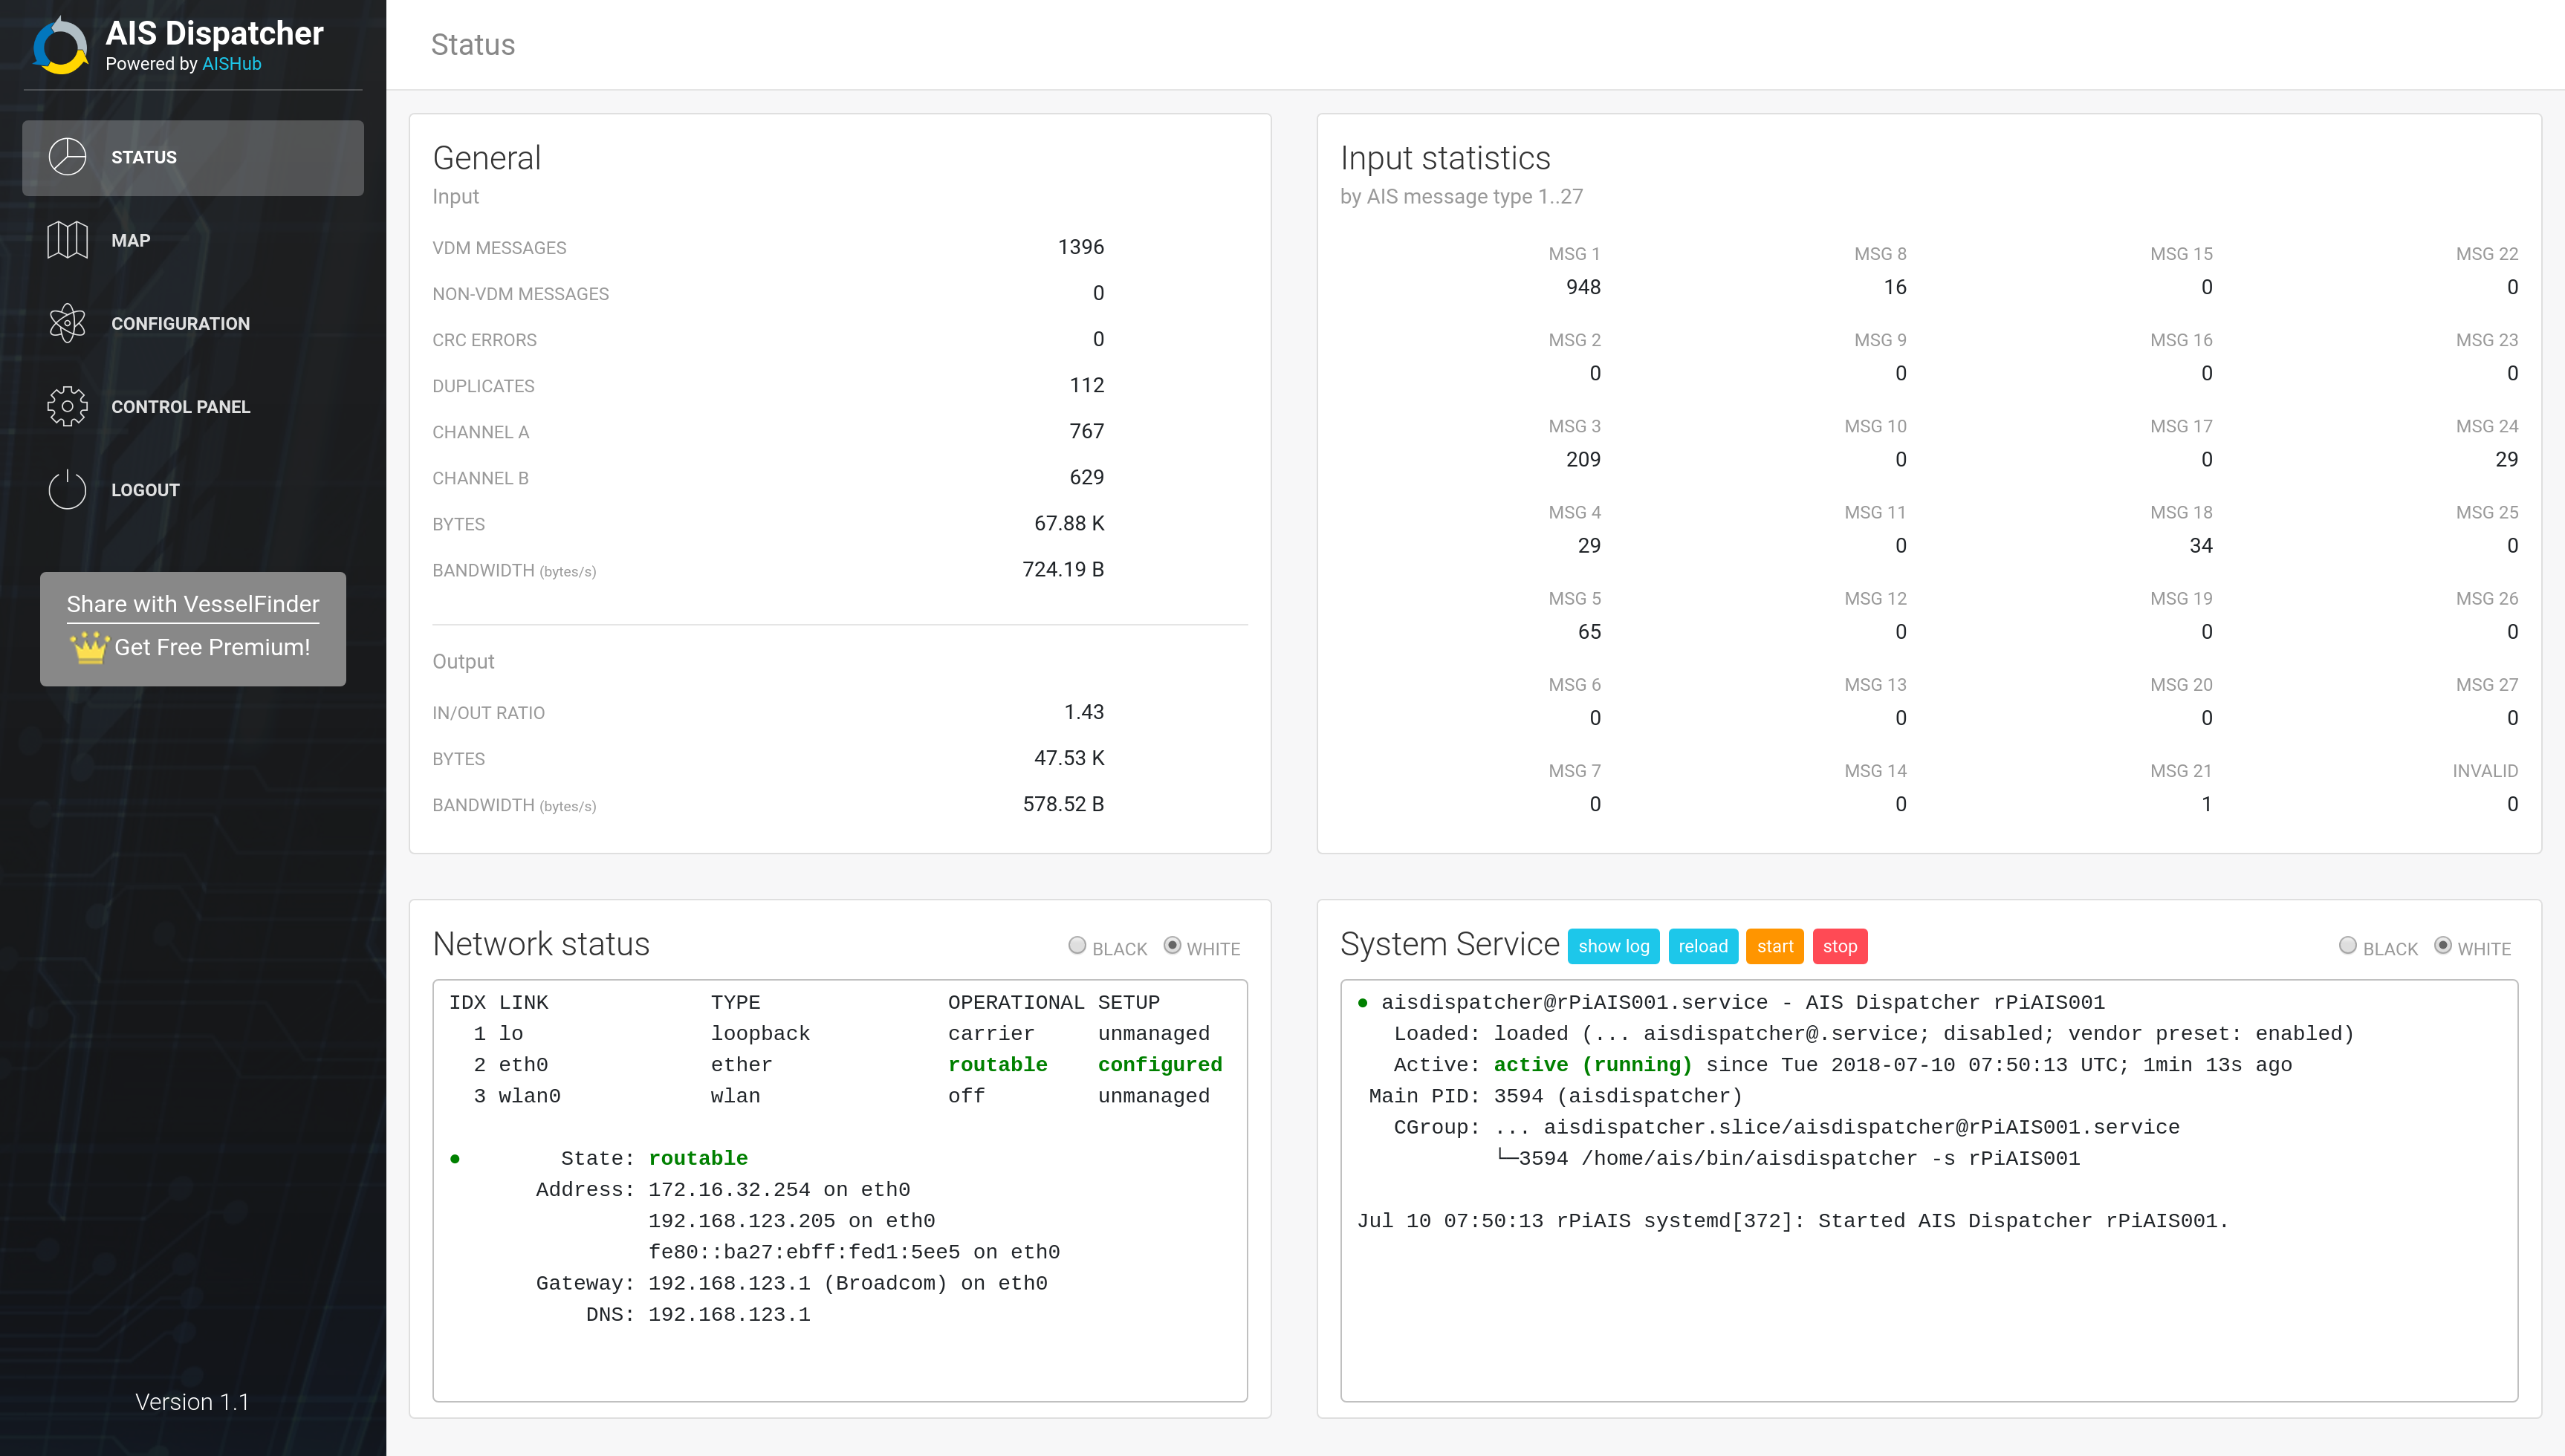
After login the web page displays the current status of your AIS station:

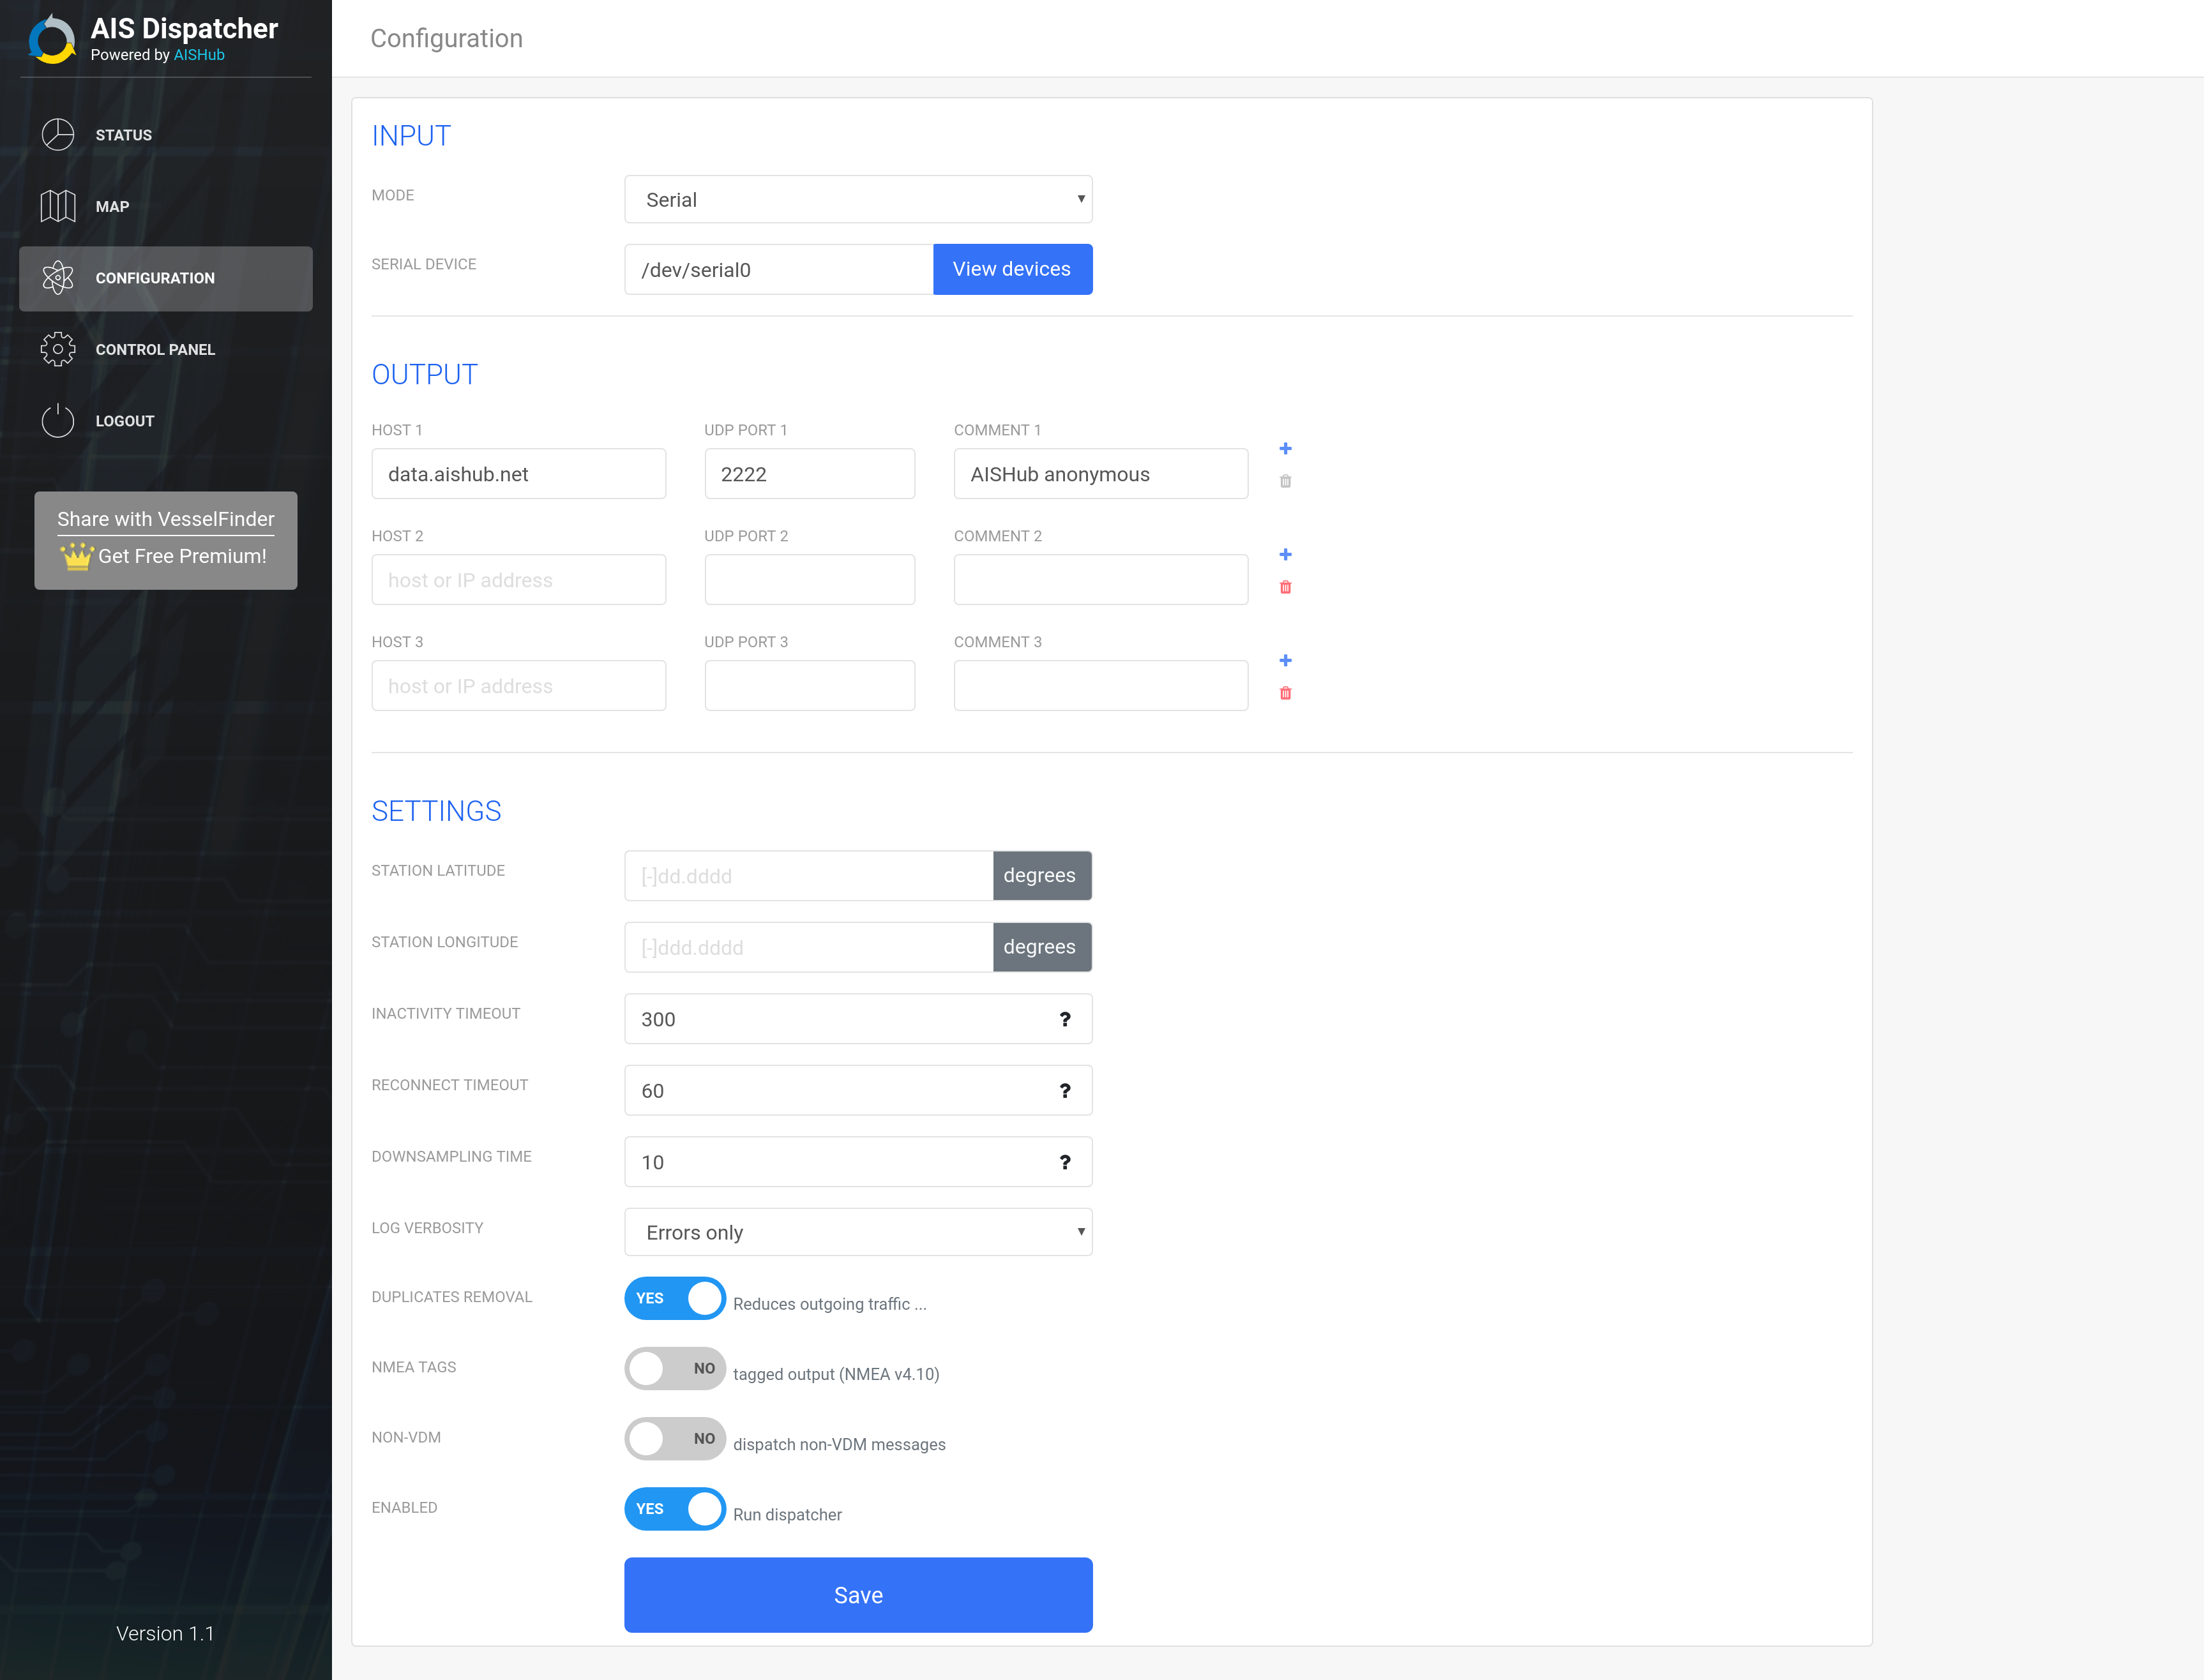
To configure your AIS Dispatcher select “Configuration” from the left panel.

There are 3 sections in the configuration panel:
- Input – configuration of connection to your AIS receiver/data source.
- Output – configuration of the destinations where AIS data will be forwarded to
- Settings – additional settings and enable/disable of AIS Dispatcher
INPUT
AIS Dispatcher supports 3 input options:
- Serial input (AIS receivers connected via serial/USB interface)38400,8,N,1 settings are applied to the serial interface by default
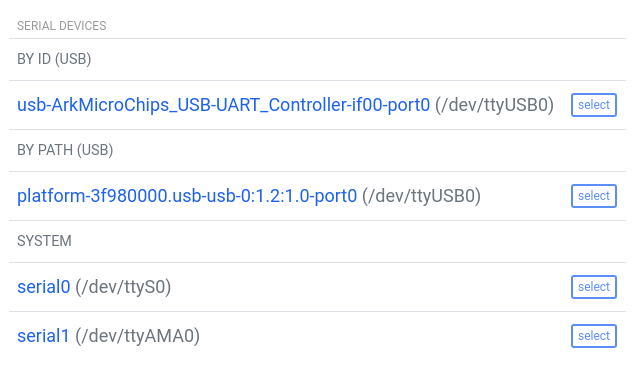
 “View devices” button displays all available serial devices in your Raspberry Pi.
You can easily select the device where your AIS receiver is connected by clicking on corresponding
“Select” button (preferably use selection “By ID” if you don’t have two devices with same ID)

-
TCP Client (AIS Dispatcher creates TCP connection to your AIS receiver/data source)

-
TCP Server (your AIS data source creates TCP connection to your RPi)

-
UDP Server (AIS Dispatcher listens for incoming UDP packets)

OUTPUT
Output section contains all destinations where your data will be forwarded to.
Current beta version supports UDP data streaming to 1 or more destination IP addresses / UDP ports.
 By default, AIS Dispatcher streams data to AISHub anonymous port and your data is displayed at VesselFinder
Settings

- Inactivity timeout – Restarts TCP connection if no AIS messages have been received for more than specified time interval (in seconds)
- Reconnect timeout – Time interval (in seconds) between two sequential connection attempts
- Downsampling time – Reduces outgoing traffic by transmitting only 1 position report per ship in the specified time frame (in seconds from 0 to 60)
- Log verbosity – Verbosity of log messages (errors only, errors+connection status, errors + connection status + debug info)
- Duplicates removal – Reduces outgoing traffic by removal of duplicated AIS messages
- Tag – Adds NMEA v4.10 tags in the beginning of output NMEA sentences
- Non-VDM – Dispatches all non-VDM (non-AIS) messages (for example GPS messages)
- Enabled – Start / Stop AIS Dispatcher
Map
If the input configuration is OK it is time to click on Map menu and start having fun with your AIS coverage.

